How to Choose the Right Projector Lens for Any Auditorium – Blog
November 11, 2025 at 11:33 am,
No comments
Selecting the appropriate projector lens for your auditorium represents one of the most critical decisions in any projection system design, directly impacting image quality, installation feasibility, and long-term operational success. While projectors themselves receive significant attention during specification processes, the lens selection determines whether your expensive projection equipment can actually deliver desired results in your specific venue. Understanding how to match lens characteristics to auditorium throw distance requirements, screen dimensions, mounting constraints, and performance expectations separates successful installations from projects plagued by compromised image quality, limited placement options, or expensive post-installation corrections requiring lens replacements or system redesigns.
Auditorium throw distance the physical measurement from projector lens to screen surface—governs which lens types can achieve your target screen size from available mounting positions. However, throw distance represents just one factor in comprehensive lens selection methodology. Professional AV integrators must simultaneously consider lens shift capabilities, zoom ranges, optical performance characteristics, brightness transmission, compatibility with projector chassis, and interactions with screen gain and ambient light conditions. Each lens specification influences others, creating an interconnected decision matrix where optimal selections balance multiple competing priorities rather than maximizing single parameters in isolation.
Modern AV system integration software has transformed how professionals approach projector lens selection, evolving from manual specification sheet comparisons into sophisticated design platforms modeling optical behavior in actual room geometries. Advanced tools like XTEN-AV X-DRAW integrate lens databases with throw calculations, 3D visualization, and performance simulation, allowing designers to evaluate how different lens options perform in specific auditoriums before procurement. This analytical capability prevents the costly trial-and-error approaches that plagued earlier generations of integrators forced to rely on theoretical calculations and manufacturer claims without practical verification tools.
This comprehensive guide explores every dimension of projector lens selection for auditoriums, from fundamental optical principles through advanced selection strategies for complex multi-projector systems. You’ll discover how to calculate lens requirements from venue dimensions, interpret manufacturer specifications correctly, evaluate optical quality indicators, avoid common selection mistakes that compromise installations, and leverage professional design software accelerating specification while improving accuracy. Whether you’re specifying lenses for an intimate 100-seat corporate training room or a grand 2000-seat performing arts center, mastering lens selection principles ensures your auditorium projector setup delivers the visual excellence clients expect and audiences demand.
Why Learning to Choose the Right Projector Lens for Auditorium Projector Setup is Essential
The importance of mastering projector lens selection extends far beyond simply finding a lens matching your calculated throw ratio. Lens choice fundamentally determines your projection system’s capabilities, limitations, and ultimate performance in ways that affect every aspect of installation and operation. Integrators who develop deep lens selection expertise make informed specifications during critical design phases, while those treating lenses as interchangeable commodities frequently encounter expensive problems during installation, commissioning, or operational phases when corrections prove difficult and costly.
Projector lenses control how light from projection engines reaches screens, governing not just image size but also optical performance characteristics including edge-to-edge sharpness, brightness uniformity, color accuracy, and geometric precision. Premium lenses employ sophisticated optical designs with multiple lens elements, specialized coatings, and precise manufacturing tolerances delivering exceptional image quality, while budget lenses cut costs through simplified designs that compromise performance. For auditoriums where audiences scrutinize large images from various seating positions, lens quality differences become immediately apparent—premium optics deliver consistent clarity across entire screens, while inferior lenses exhibit soft corners, brightness fall-off, chromatic aberrations, and distortions degrading viewing experiences.
Installation flexibility and mounting options depend entirely on lens characteristics. A projector’s available lens shift range determines how far above, below, or beside screen center you can mount equipment while maintaining proper image positioning without keystone correction. Zoom ranges provide adjustment flexibility accommodating measurement uncertainties, installation tolerances, and future screen size changes. Interchangeable lens systems enable optimizing optical performance for specific auditorium throw distances rather than accepting compromises from fixed-focal-length designs. Understanding these lens capabilities during design enables selecting mounting positions optimizing multiple factors—structural adequacy, maintenance accessibility, aesthetic invisibility, thermal management, and sightline preservation—rather than accepting whatever position happens to work with arbitrarily chosen lenses.
Financial implications make lens selection economically critical. Professional auditorium projection lenses range from $1,500 for basic options to $15,000+ for specialized long-throw, ultra-short-throw, or motorized zoom designs with exceptional optical quality. Selecting inappropriate lenses necessitates expensive replacements or accepting compromised performance degrading system value. When a $6,000 lens proves incompatible with venue geometry or fails to deliver expected image quality, projects face difficult budget conversations and potential client dissatisfaction. Conversely, over-specifying unnecessarily expensive lenses when more economical options would perform adequately wastes budget that could enhance other system aspects. Proper lens selection balances performance requirements against budget realities, maximizing value rather than blindly pursuing premium specifications.
Professional AV design standards emphasize lens selection as specialized expertise distinguishing qualified integrators from generalists. Organizations like AVIXA include lens specifications and optical principles in certification curricula, recognizing that comprehensive projector knowledge demands understanding lens behavior, not just chassis specifications. Integrators demonstrating lens selection mastery gain client confidence, differentiate their proposals through detailed optical justifications, and avoid the performance problems that plague competitors relying on manufacturer default recommendations without critical evaluation. When combined with modern projection calculator software validating lens choices against specific venue requirements, lens selection expertise becomes powerful competitive advantage translating into more successful projects and satisfied clients.
Understanding Projector Lens Fundamentals: Optical Principles and Key Concepts
Projector lens technology embodies sophisticated optical engineering translating digital images into projected light patterns filling screens with accurate, bright, sharp imagery. Understanding fundamental lens principles enables making informed selection decisions based on actual optical behavior rather than marketing specifications or superficial comparisons.
Throw Ratio: The Foundation of Lens Specification
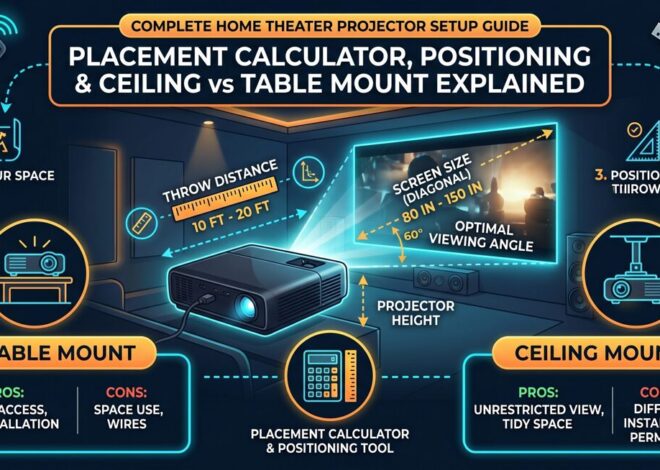
Throw ratio expresses the mathematical relationship between projection distance and screen width as a simple ratio, calculated as: Throw Ratio = Projection Distance ÷ Screen Width. Each lens exhibits characteristic throw ratio determining required auditorium throw distance for producing specific image sizes. A lens with 2.0:1 throw ratio positioned 60 feet from screen produces a 30-foot-wide image; the same lens at 80 feet creates a 40-foot image. Zoom lenses provide throw ratio ranges (e.g., 1.5-2.3:1) allowing adjustment across distance spans, while fixed-focal-length lenses offer single ratios with no adjustment capability. Understanding throw ratio enables quick preliminary assessments during site surveys: measure available distance, divide by target screen width, and you immediately know required lens throw ratio category. This fundamental relationship governs all subsequent lens selection decisions.
Lens Shift: Enabling Flexible Mounting Without Geometric Distortion
Lens shift mechanisms allow repositioning projected images vertically and horizontally without physically moving projectors or introducing digital keystone correction. Lens shift range specifies how far (expressed as percentage of image height or width) images can move. A projector with 60% vertical lens shift can position images up to 60% of their height above or below the optical centerline. This flexibility proves invaluable in auditoriums where mounting positions don’t align perfectly with screen centers due to structural constraints, architectural features, or aesthetic requirements. Adequate lens shift enables optical correction maintaining perfect geometry and image quality, while insufficient shift forces reliance on digital correction degrading resolution and introducing artifacts. Professional lens selection prioritizes generous lens shift ranges providing mounting flexibility without performance compromise.
Zoom Range: Balancing Flexibility and Optical Performance
Zoom lenses provide continuous adjustment across throw ratio ranges, typically offering 1.3× to 2.0× zoom factors. A lens spanning 1.8-2.7:1 throw ratios provides 1.5× zoom (2.7 ÷ 1.8 = 1.5). This adjustment flexibility accommodates measurement uncertainties, installation variations, and future screen size changes without lens replacement. However, zoom lenses embody optical trade-offs: they’re mechanically and optically more complex than fixed designs, typically exhibit slightly lower brightness transmission (5-10% light loss), and may show performance variations across zoom ranges. Fixed-focal-length lenses offer single throw ratios without adjustment but frequently deliver superior optical quality with higher brightness transmission and better edge sharpness. Professional lens selection weighs flexibility benefits against optical performance considerations, choosing zoom when versatility provides essential value and fixed when ultimate image quality justifies sacrificing adjustment capability.
Optical Quality Indicators: Evaluating Image Performance Characteristics
Lens optical quality encompasses multiple performance dimensions beyond basic specifications. Edge-to-edge sharpness describes how well lenses maintain focus uniformity across entire image areas—premium lenses deliver consistent clarity to extreme corners while budget optics exhibit soft edges and reduced detail. Brightness uniformity measures light distribution consistency—high-quality lenses maintain relatively constant illumination across screens (±10-15% variation) while inferior designs show pronounced brightness fall-off at edges creating visible hotspots. Chromatic aberration correction determines whether lenses properly focus all light wavelengths at identical distances—poorly corrected lenses exhibit color fringing at high-contrast edges degrading sharpness. Geometric distortion characteristics affect whether images maintain accurate proportions—barrel or pincushion distortion creates curved lines where straight edges should appear. Professional integrators evaluate these optical quality factors beyond basic throw ratio specifications when selecting lenses for demanding auditorium applications.
Lens Transmission and Brightness Impact
Every optical element between projection engine and screen absorbs some light, reducing lumen output reaching screens. Lens transmission specifies the percentage of projector’s native lumens passing through lens optics, typically ranging from 85-95% for quality designs. A 10,000-lumen projector with 90% transmission lens delivers 9,000 lumens to the screen; the same projector with 80% transmission lens provides only 8,000 lumens—a significant 1,000-lumen difference affecting brightness calculations. Complex zoom lenses with many optical elements generally exhibit lower transmission than simple fixed designs. When calculating whether projectors deliver adequate screen brightness, always account for lens transmission factors rather than assuming projector’s rated lumens reach screens undiminished. Professional projection calculator software incorporates lens transmission data when validating brightness specifications.
Types of Projector Lenses: Categories and Applications
Projector lenses fall into distinct categories defined by throw ratio ranges, optical designs, and intended applications. Understanding these categories helps narrow lens selection to appropriate options for specific auditorium requirements.
Ultra-Short Throw Lenses (0.25:1 to 0.6:1)
Ultra-short throw technology enables projection from mere inches away from screens, producing large images from extremely compressed distances. These specialized lenses employ complex optical designs with mirrors or extreme wide-angle elements creating throw ratios below 0.6:1. UST lenses suit specific niche applications—interactive displays, architectural installations with severe space constraints, or specialized simulation environments—but rarely serve traditional auditorium projector setup scenarios. The extreme projection angles create challenging geometric correction requirements, mounting positions conflict with typical auditorium architecture, and optical complexity limits these lenses to specific projector models supporting their unique requirements. Professional integrators generally reserve UST specifications for unusual projects where conventional mounting proves literally impossible rather than treating them as general-purpose solutions.
Short-Throw Lenses (0.6:1 to 1.3:1)
Short-throw lenses mount relatively close to screens—typically 8-20 feet for 15-foot images. These lenses suit auditoriums with shallow dimensions, very low ceilings, or architectural constraints preventing traditional mounting distances. Short-throw specifications reduce auditorium throw distance requirements enabling installation in space-constrained venues. However, they embody trade-offs: wider projection angles increase vulnerability to obstructions, mounting positions often conflict with audience seating or ambient light fixtures, and optical designs may compromise edge performance compared to longer-throw alternatives. Short-throw lenses work best for smaller auditoriums (under 150 seats) with ceiling heights below 14 feet where standard throw options prove impractical. Professional selection considers whether space constraints truly necessitate short-throw compromises or whether creative mounting positions enable superior standard-throw alternatives
Standard Throw Lenses (1.3:1 to 2.8:1)
Standard throw represents the sweet spot for most auditorium applications, offering optimal balance between performance, flexibility, and compatibility. Lenses in this range suit typical auditorium proportions where mounting positions fall 1.3-2.8 times screen width distance from screens. Standard throw optics deliver excellent image quality with proven optical designs, wide equipment selection across manufacturers and price points, and mounting positions accommodating typical ceiling heights and room depths. Most professional projector manufacturers concentrate development resources in this throw ratio category, providing extensive options including zoom lenses with various ranges, fixed-focal-length designs for premium performance, and specialized variants with enhanced lens shift or motorized control. Professional integrators specify standard throw lenses whenever venue geometry permits, reserving other categories for situations where architectural constraints demand alternatives.
Long-Throw Lenses (2.8:1 to 7.0:1+)
Long-throw lenses serve large auditoriums, performing arts centers, and venues where architectural scale demands distant mounting positions. Lenses exceeding 2.8:1 throw ratios enable projection from projection booths, deep balcony positions, or ceiling catwalks located far behind seating areas. Long-throw optics excel at large venue applications by enabling mounting in optimal locations providing excellent maintenance access, thermal management, security, and equipment invisibility while delivering superior optical quality through relatively narrow projection angles reducing geometric stress on optical designs. The narrow projection cones simplify obstruction avoidance and typically maintain better edge-to-edge performance than wider-angle alternatives. However, long-throw systems require careful brightness specification as inverse-square light loss becomes pronounced at extended distances. Professional large venue projection designs frequently employ long-throw lenses when auditorium depths exceed 80 feet or when dedicated projection facilities exist.
Interchangeable Lens Systems and Motorized Optics
Professional projection system design increasingly employs projectors with interchangeable lens systems offering comprehensive lens libraries. A single projector chassis might accommodate eight or more lens options spanning 0.8:1 through 8.0:1 throw ratios, allowing precise optical optimization for specific venues without changing projector models. This flexibility proves valuable for large institutions with multiple venues, enabling equipment standardization while varying lenses by space characteristics. Motorized zoom, focus, and lens shift add operational convenience through remote adjustment without physical projector access. Premium motorized systems include lens memory features storing multiple presets for different screen formats or content types, automatically reconfiguring projection geometry based on program requirements. This automation capability integrates with AV control systems creating sophisticated venue management enabling format changes in seconds rather than requiring technician interventions. Professional lens selection considers interchangeable systems when venues require adaptation flexibility or when standardization across multiple spaces provides operational advantages.
Calculating Lens Requirements for Your Auditorium
Systematic lens calculation procedures ensure specifications match venue requirements and deliver intended performance without surprises during installation or commissioning phases.
Step 1: Determining Required Screen Dimensions and Aspect Ratios
Begin lens selection by establishing target screen dimensions based on auditorium geometry and viewing distance requirements. Professional standards recommend screen width approximately 1/6th to 1/8th the distance to furthest viewers for critical viewing. For a 90-foot-deep auditorium, this suggests 11-15 foot screen widths. Consider required aspect ratios (16:9 for multimedia, 16:10 for corporate presentations, 2.39:1 for cinema) as this affects screen width values used in throw calculations. Document target screen width as this becomes your primary calculation input. For venues requiring multiple formats, calculate lens requirements for each aspect ratio scenario ensuring selected lenses accommodate all intended uses without compromising any configuration.
Step 2: Measuring Available Auditorium Throw Distance and Mounting Positions
Conduct thorough site surveys measuring actual distances from potential mounting positions to screen surfaces using laser distance meters ensuring accuracy. Measure to the screen plane, not the wall behind it. Document ceiling heights at mounting positions, structural element locations, and any architectural features potentially limiting placement options. Identify at least three candidate mounting positions providing flexibility during detailed design. Photograph extensively creating visual records supporting design decisions. Never rely solely on architectural drawings for distance measurements—verify dimensions in the field accounting for as-built conditions that frequently deviate from original plans. This measurement discipline prevents discovering that calculated lenses won’t actually work when installation begins.
Step 3: Calculating Required Throw Ratio from Measurements
For each measured mounting position, calculate necessary throw ratio using: Required Throw Ratio = Measured Distance ÷ Target Screen Width. For example, if you measured 55 feet from mounting position to screen and need a 22-foot screen width: 55 ÷ 22 = 2.5:1 throw ratio required. Generate these calculations for all candidate positions creating a matrix showing distances, resulting throw ratios, and feasibility assessments. This analysis reveals which positions demand impractical throw ratios (too extreme for available lens options) versus positions offering standard ratios with broad equipment selection. Prioritize mounting positions yielding throw ratios in the 1.5-2.5:1 range where lens availability, performance, and cost optimize simultaneously unless architectural constraints force alternatives.
Step 4: Researching Compatible Lens Options for Your Projector
With required throw ratios calculated, research which lenses fit your chosen projector model. Consult manufacturer lens charts identifying compatible options, their throw ratio specifications, zoom ranges, lens shift capabilities, and physical characteristics. Most professional projectors support multiple interchangeable lenses providing flexibility. For your calculated throw ratio requirements, identify lenses whose specifications bracket required values with margin on both sides. If you need 2.5:1, seek lenses offering ranges like 2.0-3.0:1 or 2.3-2.9:1, positioning required distance comfortably within available zoom ranges rather than at extreme endpoints. Create shortlists of compatible lenses for each viable mounting position, documenting specifications and pricing for comparison and value engineering discussions.
Step 5: Evaluating Lens Shift Requirements and Mounting Flexibility
Calculate whether candidate lenses provide adequate lens shift for proposed mounting positions. Measure vertical offset between mounting height and screen center, then calculate required shift as percentage of image height. If mounting 7 feet above screen center with a 10-foot-tall image, you need 70% vertical lens shift capability (7 ÷ 10 = 0.70 = 70%). Verify candidate lenses meet or exceed required shift ranges with margin for adjustment. Remember that lens shift doesn’t change throw ratio or distance—it affects mounting position flexibility relative to screen center. Inadequate shift forces either mounting relocation or acceptance of keystone correction degrading image quality. Professional practice prioritizes lenses with generous shift ranges (±60-100%) enabling flexible mounting without geometric compromise.
Step 6: Validating Zoom Range Positioning and Performance Optimization
For zoom lens candidates, verify where your required auditorium throw distance falls within available zoom ranges. Calculate both zoom endpoints: Minimum Distance = Minimum Throw Ratio × Screen Width and Maximum Distance = Maximum Throw Ratio × Screen Width. For a lens offering 1.8-2.6:1 throw ratios and 20-foot screen: minimum distance = 36 feet, maximum = 52 feet. If your mounting position measures 44 feet, it falls comfortably mid-range—ideal for optimal performance and adjustment flexibility. Avoid specifications positioning required distances at extreme zoom endpoints (within 10% of limits) as this compromises optical quality and eliminates adjustment margin for installation variations. Professional lens selection targets mid-zoom operation where optical elements align optimally delivering peak sharpness, brightness uniformity, and color accuracy.
Step 7: Accounting for Brightness Transmission and Lumen Budget
Calculate effective lumen output reaching screens accounting for lens transmission specifications. If projector provides 12,000 native lumens and lens transmission is 88%, effective output is 10,560 lumens (12,000 × 0.88). Verify this adjusted lumen value meets requirements for target screen brightness considering screen size, screen gain, and ambient light conditions. If brightness calculations fall short, either specify higher-output projectors or consider alternative lenses with superior transmission characteristics. Some premium lenses achieve 92-95% transmission providing meaningful brightness advantages over budget optics with 80-85% transmission. Professional projection design always accounts for lens transmission when validating brightness specifications rather than assuming projector’s rated lumens reach screens undiminished.
Step 8: Documenting Lens Selection Rationale and Alternatives
Create comprehensive documentation recording all calculations, lens specifications, mounting assumptions, and selection rationale. Document alternative lens options considered and reasons for selections or rejections. This documentation supports client discussions, value engineering exercises, and troubleshooting if problems emerge. Professional AV system integration software automates much of this documentation, linking lens selections to throw calculations, mounting specifications, and procurement lists ensuring consistency throughout project documentation. The documentation also proves invaluable for future system modifications or upgrades when understanding original design logic prevents repeating analysis from scratch.
XTEN-AV X-DRAW: The Professional Standard for Projector Lens Selection and Design
Among projection calculator software and design platforms available to professional AV integrators, XTEN-AV X-DRAW distinguishes itself through purpose-built capabilities addressing every aspect of projector lens selection and installation planning. This platform transcends isolated calculation tools by integrating product-level accuracy, workflow automation, and visual design environments that transform lens specification from time-consuming manual processes into streamlined, validated workflows.
Product-Level Accuracy—Not Just Ratios
Many free throw calculators ask only for throw ratio and screen width, returning generic distance recommendations. XTEN-AV’s projector calculator uses model-level specifications applying actual projector and lens data to your room dimensions, aspect ratios, and lens characteristics so recommendations are tailored to specific equipment models including zoom ranges, lens shift limits, and native throw specifications. This product-level precision lowers the chance you’ll select lenses that technically “fit” on paper but won’t reach target distances or will require extreme zoom positioning in the field. In short: real model data prevents surprises on site. The difference between theoretical throw ratio calculations and actual lens behavior in specific projectors can mean the difference between perfect installations and expensive lens exchanges.
Integrated Workflow: Calculator to Drawing to BOM to Proposal
X-DRAW operates within XTEN-AV’s cloud platform where throw calculators, drawing tools, BOM automation, and proposal outputs coexist in unified environments. Lens calculations performed in projector tools instantly transfer to ceiling plans in X-DRAW, which automatically generates parts lists and pricing for client proposals. For AV integration teams, this eliminates manual transcription preventing mismatched lens specifications between documents and dramatically accelerating delivery of defensible proposals. The result: one source of truth for design, procurement, and installation. When lens selections feed directly into procurement systems, the risk of ordering incorrect models—a common and expensive mistake—virtually disappears. This workflow integration distinguishes professional platforms from hobby-grade calculators that provide numbers requiring manual transfer across multiple disconnected tools.
Automation That Saves Professional Time
X-DRAW emphasizes automation for AV tasks including automatic schematic generation, equipment rack layouts, and documentation outputs (BOMs, installation PDFs). When lens and placement decisions feed these automated outputs, you save hours otherwise spent on manual CAD edits and spreadsheet calculations. For integrators who price by project hours, this directly cuts cost and accelerates time-to-proposal. This proves particularly valuable for firms managing multiple simultaneous projects where design efficiency directly impacts profitability. Compare this practical advantage with single-purpose calculators requiring manual transfer of results into drawings, proposals, and procurement systems—the workflow friction adds up to significant hidden costs that integrated platforms eliminate.
Visual Layout and Documentation—Not Just Numbers
The calculator is built for visual design processes. Instead of providing single throw-distance numbers, XTEN-AV produces schematic layouts and elevation diagrams showing projector positions, lens selections, and screen extents. This visual evidence proves invaluable for client sign-off and prevents installers from misinterpreting numeric outputs alone. Clients understand drawings far better than specification sheets, and installation teams work more confidently with visual mounting diagrams than text descriptions of placement. Many online calculators provide numbers without install-ready diagrams—XTEN-AV treats visualization as essential rather than optional. The visual approach also facilitates design reviews identifying problems that numeric specifications might hide.
Collaboration and Cloud Access
Because XTEN-AV operates as a cloud-based platform, multiple stakeholders—designers, sales teams, installation crews—can view identical designs and calculations, add comments, and access synchronized BOMs. This collaboration reduces mismatched assumptions (e.g., design specifies one lens, procurement orders another) that plague projects with siloed information. For larger auditorium projects involving many parties requiring consensus, this single collaborative source represents significant advantage. User reviews consistently highlight the platform’s collaborative features and workflow benefits as differentiators from traditional tools. The version control and comment features enable tracking how lens selections evolved through project development, valuable when explaining decisions to questioning stakeholders.
Built for Pro AV: Handles Edge Cases
Manufacturer calculators (Christie, Epson, BenQ) excel for their specific hardware but remain brand-specific. General calculators (ProjectorCentral, random web tools) offer breadth but sometimes miss model-specific subtleties like optical zoom ranges, lens shift limits, or stacking alignment rules. XTEN-AV targets AV integrators with built-in attention to professional use cases including lens shift modeling, multi-projector blending, brightness and lumen verification, and integration with installation drawings. This makes it more suitable for commercial auditorium installations than consumer-focused calculators. The professional focus means the tool handles the complex scenarios integrators encounter daily rather than optimizing for simplicity that sacrifices the precision commercial projects demand.
Practical Reduction of Site-Visits and Change-Orders
Because the platform produces install-ready outputs—visuals plus parts lists—tied to precise model specifications, integrators report fewer unforeseen issues and fewer SKU swaps after equipment delivery. Fewer change orders and fewer site revisits translate to measurable ROI—not just convenience. Independent user reviews and comparative roundups consistently cite this workflow advantage. The cost of change orders and repeat site visits can easily exceed thousands of dollars per project, making tools that prevent these problems economically justified through operational savings alone beyond the design quality benefits they provide.
Model-Level Projector Database and Throw Logic
X-DRAW maintains projector model specifications including native throw characteristics, zoom ranges, and lens shift limits rather than generic throw ratios. This means placement and lens recommendations work for exact models including warnings if models can’t achieve required screen widths without additional lens options or alternative configurations. This prevents ordering wrong lenses or mounting in incompatible locations. The database updates as manufacturers release new models, ensuring calculations reference current equipment rather than outdated specifications. For integrators working with multiple projector brands, this multi-manufacturer database eliminates maintaining separate specification libraries and reduces research time dramatically.
Multi-Calculator Suite: Throw, Brightness, Screen Sizing
XTEN-AV provides throw distance, brightness and projection contrast guidance, screen size calculators, and other AV calculators in unified ecosystems. Projection success is multi-factorial—throw distance calculations only prove useful if brightness and screen gain are correct simultaneously. Having all calculators in one ecosystem helps validate placements end-to-end considering size, brightness, and throw together rather than treating them as independent variables. This integrated approach reflects the reality that lens selection interacts with every other projection system parameter, requiring holistic analysis rather than isolated optimization.
Coverage of Pro AV Scenarios: Lens Shift, Stacking, Multi-Projector Blending
The platform accounts for lens shift limits, stacking alignments, and can be used as part of multi-projector edge-blending workflows when paired with drawing and documentation tools. Auditoriums and large venues often need stacked or blended projectors and will fail if tools ignore lens shift and stacking geometry. XTEN-AV’s approach is less likely to miss those constraints compared to simple calculators. The multi-projector capabilities enable designing complex projection arrays with confidence that all geometric relationships have been properly calculated and validated before equipment arrives on site.
Common Projector Lens Selection Mistakes and How to Avoid Them
Despite lens selection’s critical importance, several recurring mistakes compromise auditorium installations. Recognizing these pitfalls enables proactive prevention through careful specification practices.
Mistake 1: Selecting Lenses Based Solely on Throw Ratio Without Verifying Zoom Range Compatibility
Many integrators calculate required throw ratios then select lenses whose specifications include those ratios without verifying where calculated distances fall within available zoom ranges. A lens offering 1.5-2.3:1 throw ratios seems compatible with a 2.0:1 requirement, but if your specific distance falls at the extreme 2.3:1 endpoint, you operate at maximum zoom compromising optical performance and eliminating adjustment flexibility. Best practice calculates both zoom endpoints verifying required distances fall within the central 60-80% of available ranges. This ensures optimal optical performance and preserves adjustment margin for installation tolerances. Projection calculator software should visualize zoom range positioning, flagging when specifications force extreme zoom operation.
Mistake 2: Ignoring Lens Shift Requirements and Discovering Mounting Impossibilities During Installation
Designers calculate throw distances correctly but overlook lens shift verification, discovering during installation that selected lenses lack sufficient shift for proposed mounting positions. If mounting 10 feet above screen center with an 11-foot image requires 91% vertical lens shift (10 ÷ 11 = 0.91), but your lens provides only 60% shift, the installation fails geometrically. The projector must be relocated (expensive and disruptive) or excessive digital keystone must be applied (degrading image quality). Prevent this by always calculating required lens shift percentages during design and verifying candidate lenses exceed requirements with margin. Never assume “standard” lens shift will suffice—verify actual specifications against actual mounting geometry.
Mistake 3: Overlooking Lens Transmission Impact on Brightness Calculations
Integrators calculate lumen requirements based on projector specifications without accounting for lens transmission losses, discovering post-installation that actual screen brightness falls 10-15% below target. A 10,000-lumen projector with 85% transmission lens delivers only 8,500 lumens to screen—a 1,500-lumen shortfall potentially compromising visibility. This mistake stems from treating lenses as transparent conduits rather than optical systems with inherent losses. Prevent by always applying lens transmission factors when validating brightness specifications. Manufacturer lens documentation includes transmission specifications; professional projection design incorporates these values into photometric calculations. If brightness margins are tight, consider premium lenses with 92-95% transmission providing meaningful advantages over budget optics at 80-85%.
Mistake 4: Choosing Fixed-Focal-Length Lenses Without Adequate Installation Certainty
Fixed-focal-length lenses deliver superior optical quality but eliminate adjustment flexibility. Integrators specify fixed lenses based on calculated measurements without accounting for installation tolerances, measurement uncertainties, or potential future changes. During installation, they discover actual mounting positions differ from measurements by several feet (not uncommon in renovation projects), rendering fixed lenses incompatible. The project requires expedited lens replacement at significant cost and schedule impact. Prevent by reserving fixed-focal-length specifications for situations where measurements are absolutely certain, installation conditions are fully controlled, and future flexibility is genuinely unnecessary. For most auditoriums, zoom lenses providing 1.3-1.5× adjustment range offer valuable insurance against uncertainties while delivering excellent optical quality with modern designs.
Mistake 5: Selecting Incompatible Lenses for Projector Models
Not all lenses fit all projectors, even within single manufacturer product lines. Integrators select lenses based on optical specifications without verifying mechanical compatibility with chosen projector chassis. During procurement, they discover selected lenses don’t physically mount to specified projectors, requiring emergency respecification. This mistake is particularly common when working with multiple projector models or switching between product generations. Prevent by always cross-referencing lens compatibility charts confirming selected lenses explicitly support chosen projector models. Professional AV system integration software with integrated equipment databases automatically flags compatibility issues, preventing specification errors that manual processes miss.
Mistake 6: Under-Specifying Lens Quality for Critical Viewing Applications
Budget-conscious integrators specify minimum-cost lenses meeting basic throw ratio requirements without evaluating optical quality characteristics. Post-commissioning, clients complain about soft edges, brightness non-uniformity, or chromatic aberrations degrading viewing experiences. The integrator faces difficult conversations about image quality compromises and potential lens upgrades consuming project contingencies. Prevent by evaluating lens optical quality indicators—edge sharpness specifications, brightness uniformity ratings, chromatic aberration correction—during selection. For critical applications like broadcast, high-end corporate, or performing arts auditoriums, specify premium lenses even if budget pressure suggests economies. The performance difference justifies cost differentials, and attempting to save $2,000-3,000 on lens specifications while spending $40,000 on projectors proves false economy when image quality disappoints stakeholders.
Case Studies: Lens Selection Solutions for Challenging Auditorium Projects
Real-world installation projects demonstrate how systematic lens selection combined with professional design tools resolves complex scenarios and delivers exceptional results.
Case Study 1: Corporate Headquarters Auditorium with Unconventional Aspect Ratio Requirements
A technology company’s 400-seat auditorium required supporting both standard 16:9 multimedia content and ultra-wide 21:9 presentations for design reviews. The venue specified a permanent 32-foot-wide motorized screen with masking accommodating both formats. This created lens challenges: maintaining optimal image quality across different aspect ratios while accommodating a single mounting position. Auditorium throw distance measured 68 feet from ceiling mounting position to screen. For 16:9 primary use (32-foot width), required throw ratio was 2.125:1 (68 ÷ 32). For 21:9 ultra-wide (32-foot width, vertically masked), the throw ratio remained identical but image height reduced to 10.9 feet versus 18 feet for 16:9. The design team used XTEN-AV X-DRAW evaluating multiple lens options. The platform identified a premium motorized zoom lens (1.8-2.7:1) with ±70% vertical lens shift and lens memory presets. The solution programmed two presets: (1) 2.125:1 zoom filling entire 32×18-foot 16:9 screen, (2) 2.125:1 zoom with downward lens shift positioning image in upper screen portion for 21:9 format. The lens recommendation feature confirmed mid-zoom positioning maintained optimal optical performance for both configurations. Post-installation, format switching occurred in under 8 seconds via automated AV control system integration, and clients reported excellent image quality across both formats. This case demonstrated how sophisticated lens selection combined with motorized features enables operational flexibility meeting diverse requirements from single mounting positions.
Case Study 2: Historic Theater Retrofit with Extreme Long-Throw Requirements
A landmark 900-seat theater required modern projection while preserving architectural integrity. Historic preservation requirements prohibited ceiling modifications, limiting mounting to the existing projection booth 135 feet from a new 42-foot screen. This extreme auditorium throw distance created significant lens challenges: 135 ÷ 42 = 3.21:1 throw ratio—at the edge of typical long-throw capabilities and well into specialized lens territory. Initial equipment research found few laser projectors with lenses supporting this ratio, most costing $70,000+ due to specialized optics. The AV integrator used X-DRAW’s lens database exploring alternatives. The platform identified a flagship projector supporting an optional 3.0-3.8:1 motorized long-throw lens at $9,500 totaling $54,000 for projector plus lens. The zoom range (3.0-3.8:1) positioned the required 3.21:1 ratio at approximately 25% of zoom travel—slightly toward the wide end but within acceptable optical performance zone. The 3D visualization feature revealed the booth window created slight focus shift requiring calibration compensation during commissioning. However, the lens’s precise focus motor enabled programming this compensation into installation presets. Post-installation brightness measurements showed 38,000 lumens on screen with excellent uniformity, and the historic booth remained unchanged. The client praised the solution for balancing modern performance with preservation requirements. This case highlighted how comprehensive lens databases enable identifying viable options that initial research might overlook, particularly for challenging specifications at the edges of typical ranges.
Case Study 3: University Multi-Purpose Hall with Budget-Driven Creative Lens Strategy
A state university’s 350-seat multi-purpose hall renovation had a constrained $35,000 total projection budget including screen, mounting, and AV control integration. The 26-foot-wide screen and 58-foot mounting distance required approximately 2.23:1 throw ratio. Initial specifications for professional laser projectors with appropriate lenses totaled $42,000, exceeding budget by $7,000. The integrator explored alternatives using XTEN-AV’s cost and performance comparison features. The platform identified a mid-tier lamp-based projector at $18,000 supporting an optional 2.0-2.8:1 zoom lens at $2,400—total $20,400 projection equipment cost leaving $14,600 for remaining components. The lens positioned the required 2.23:1 ratio at mid-zoom (perfect for performance) with generous 75% vertical lens shift accommodating the challenging low-ceiling mounting. The lumen output (7,500 ANSI lumens) met requirements for the controlled-light environment based on X-DRAW’s brightness calculations accounting for screen gain and ambient conditions. During installation, the budget-conscious specification performed excellently, and the university reported satisfaction with image quality matching their usage requirements despite not being the highest-end option available. This case demonstrated that systematic lens selection considering the full range of options rather than defaulting to premium choices enables creative solutions meeting constraints that initially appear impossible.
Case Study 4: Performing Arts Center with Complex Multi-Projector Lens Coordination
A 1200-seat performing arts center required exceptionally wide projection for immersive performances: 55-foot screen width far exceeding single-projector capabilities. The design specified a triple-projector edge-blend system with each unit covering approximately 20 feet of width plus overlap zones. The projection booth measured 92 feet from screen, creating 92 ÷ 20 = 4.6:1 throw ratio requirement per projector. This long-throw specification demanded careful lens selection ensuring all three projectors achieved identical image geometry, brightness, and focus for seamless blending. Using XTEN-AV X-DRAW’s multi-projector features, the design team specified three identical projectors each with matched 4.5-5.5:1 motorized long-throw lenses. The platform calculated precise mounting positions spacing projectors horizontally to create 2-foot overlap zones and verified all units operated at identical 4.6:1 zoom positions maintaining matched optical characteristics. The lens shift capabilities enabled fine-tuning individual projector alignment during commissioning without mechanical adjustments. The edge-blend simulation predicted brightness distribution across overlap zones, confirming uniform illumination. During installation, the matched lenses and precise calculations enabled achieving geometric alignment in under four hours—remarkable for a three-projector blend—and brightness uniformity measured within ±3% across the entire 55-foot width. The venue reported seamless blending invisible to audiences, crediting the matched lens specifications and precision calculations. This case showcased how multi-projector systems demand even more rigorous lens selection ensuring optical matching across all units, a challenge professional design tools address far better than manual approaches.
Frequently Asked Questions About Choosing Projector Lenses for Auditoriums
Q1: What is the most important factor when choosing a projector lens for an auditorium?
The most critical factor is ensuring the lens throw ratio matches your auditorium throw distance and target screen size while positioning operation within optimal zoom range zones. Calculate required throw ratio using Throw Ratio = Distance ÷ Screen Width, then select lenses whose zoom ranges position this ratio within the central 60-80% of available travel rather than at extreme endpoints. However, throw ratio compatibility alone proves insufficient—simultaneously verify adequate lens shift range for your mounting position, acceptable brightness transmission for lumen budgets, and optical quality appropriate for viewing requirements. Professional lens selection balances multiple factors rather than optimizing single parameters, requiring systematic evaluation considering how lens characteristics interact with specific venue constraints and performance expectations.
Q2: How do I determine if a lens will work with my projector model?
Verify lens compatibility by consulting manufacturer lens compatibility charts explicitly listing which lenses fit which projector models. Most professional projector manufacturers publish detailed matrices showing lens options for each projector chassis. Never assume lenses are universally compatible even within single product families—mechanical mounting interfaces, electronic communication protocols, and optical characteristics vary across projector lines. Professional AV system integration software like XTEN-AV X-DRAW incorporates compatibility databases automatically flagging when selected lens and projector combinations prove incompatible, preventing specification errors. If working without integrated tools, directly contact manufacturer technical support confirming compatibility before finalizing specifications, as compatibility mistakes discovered during procurement create expensive delays and require emergency respecification.
Q3: Should I choose a zoom lens or fixed-focal-length lens for my auditorium?
Zoom lenses suit most auditorium applications by providing installation flexibility accommodating measurement uncertainties, tolerances, and potential future screen size changes. Modern zoom lenses deliver excellent optical performance approaching fixed-lens quality while offering 1.3-1.5× adjustment ranges valuable for practical installations. Reserve fixed-focal-length lenses for situations where ultimate optical quality justifies sacrificing flexibility, measurements are absolutely certain, and future adaptability is genuinely unnecessary. This typically applies to flagship performing arts venues, broadcast facilities, or specialized applications where minute image quality differences matter and installations are permanent with zero anticipated changes. For general corporate, educational, or worship auditoriums, zoom lenses provide optimal balance between performance and practicality. The flexibility insurance zoom provides often proves invaluable when field conditions differ slightly from design assumptions.
Q4: How does lens shift affect my projector placement options?
Lens shift determines how far above, below, or beside screen center you can mount projectors while maintaining proper image positioning without digital keystone correction. Calculate required shift as a percentage: if mounting 8 feet above screen center with a 12-foot-tall image, you need 67% vertical lens shift capability (8 ÷ 12 = 0.67). Generous lens shift (±60-100%) provides substantial mounting flexibility accommodating architectural constraints, structural limitations, and aesthetic preferences. Inadequate shift forces either accepting compromised mounting positions creating thermal management or maintenance access problems, or relying on digital correction degrading image quality. Professional practice prioritizes lenses with maximum shift ranges enabling optimal mounting positions without geometric compromise. Don’t assume “standard” shift suffices—calculate actual requirements and verify specifications exceed them with margin.
Q5: What’s the difference between short-throw and long-throw lenses and which do I need?
Short-throw lenses (0.6-1.3:1 throw ratios) mount close to screens—typically 8-20 feet for 15-foot images—suiting compact auditoriums with shallow dimensions or ceiling constraints. Long-throw lenses (2.8-7.0:1+ ratios) mount far from screens—often 70-150+ feet—serving large venues, performing arts centers, or installations with dedicated projection booths. The choice depends entirely on your auditorium throw distance: measure available distance, divide by screen width, and the resulting throw ratio indicates which lens category you need. Most auditoriums (200-800 seats) work best with standard throw lenses (1.3-2.8:1) offering optimal balance between performance and mounting practicality. Select short-throw only when architectural constraints make standard throw physically impossible, and choose long-throw when venue scale or projection booth locations demand distant mounting. The lens category follows venue geometry rather than being an arbitrary preference.
Q6: How do I account for lens quality differences when comparing options?
Evaluate optical quality through multiple indicators beyond basic throw specifications. Review manufacturer specifications for edge-to-edge sharpness ratings, brightness uniformity percentages, and chromatic aberration correction capabilities. Higher-quality lenses maintain consistent sharpness to extreme corners (90%+ of center sharpness at edges), exhibit brightness uniformity within ±10-15% across image areas, and minimize color fringing at high-contrast edges. Compare lens transmission percentages—premium lenses achieve 92-95% transmission versus 80-88% for budget options, meaningful for brightness-critical applications. Read professional reviews and case studies documenting real-world performance. For critical auditoriums, specify premium lenses even if budget pressure suggests economies—attempting to save $2,000-3,000 on lens specifications while spending $30,000-50,000 on projectors proves false economy when image quality disappoints stakeholders and compromises the entire system’s perceived value.
Q7: Can I upgrade or change lenses after initial installation?
Most professional projectors with interchangeable lens systems support post-installation lens changes, enabling upgrades, corrections, or adaptations to changing requirements. However, lens changes require recalibration including focus, lens shift positioning, and potentially modifying AV control system presets. Physical lens swaps take 15-30 minutes plus recalibration time (1-2 hours for single projectors, longer for multi-projector systems). Financial considerations matter—replacement lenses cost $1,500-$10,000 depending on specifications, making post-installation changes expensive. Design installations anticipating likely evolution: specify zoom lenses providing screen size flexibility, choose projectors with extensive lens libraries supporting future options, and document all original calculations so future changes don’t require redoing analysis from scratch. Proper initial lens selection prevents need for expensive post-installation corrections while building in reasonable adaptation capability for legitimate requirement evolution.
Q8: How does ambient light affect lens selection for auditoriums?
Ambient light doesn’t directly change optimal lens throw ratios but influences brightness requirements affecting lens selection indirectly. High ambient light demands higher projector lumen output maintaining adequate contrast and visibility. Since longer auditorium throw distances reduce screen brightness following inverse-square law, high-ambient-light venues using long-throw lenses face compounded brightness challenges requiring extremely high-output projectors. Additionally, lens brightness transmission becomes more critical in bright environments—a 10% transmission difference between lenses translates to meaningful brightness variations when margins are tight. For bright auditoriums, prioritize lenses with maximum transmission efficiency (92-95%) even if costs slightly more, as the brightness benefit justifies premium. Consider whether shorter throw distances using different lens categories might improve brightness economics by reducing distance-related losses, though this requires viable alternative mounting positions. Professional AV design software includes photometric modeling accounting for ambient light, throw distance, and lens transmission simultaneously, ensuring specifications deliver adequate brightness for actual operating conditions.
Conclusion
Mastering projector lens selection represents specialized expertise distinguishing professional AV integrators from generalists treating lenses as commodity accessories rather than critical optical components fundamentally determining projection system capabilities and performance. The comprehensive methodology explored throughout this guide—from understanding optical principles and lens categories through systematic calculation procedures and advanced selection strategies—provides the structured approach transforming lens specification from guesswork into confident, validated decisions backed by technical analysis and practical experience.
Auditorium throw distance calculations establish the foundation for lens selection, but professional competency extends far beyond basic throw ratio matching to encompass lens shift verification, zoom range optimization, optical quality evaluation, brightness transmission accounting, and considering how lens characteristics interact with specific venue constraints and operational requirements. Each specification parameter influences others, creating an interconnected decision matrix where optimal selections balance multiple competing priorities rather than maximizing single factors in isolation. Integrators who develop deep understanding of these interactions make informed lens specifications early in design processes, while those treating lenses as afterthoughts frequently encounter expensive problems during installation or commissioning when corrections prove difficult and costly.
The transformation from manual lens selection using manufacturer specification sheets and generic calculators toward integrated AV system integration software platforms like XTEN-AV X-DRAW represents a paradigm shift enabling unprecedented precision and efficiency. Modern comprehensive tools don’t simply provide throw ratio calculations faster—they fundamentally change lens specification workflows by incorporating product-level lens databases, validating compatibility automatically, visualizing optical behavior in actual room geometries, and generating installation-ready documentation bridging design and field execution. This integration eliminates the transcription errors, compatibility mismatches, and oversights that plague projects designed using disconnected tools and manual coordination across multiple software platforms.
Looking forward, projection technology continues rapid evolution with advancing laser light sources, emerging higher-resolution standards, sophisticated motorized lens systems enabling dynamic reconfiguration, and AI-assisted optimization promising to automate aspects of lens selection that currently require expert judgment. However, the fundamental optical principles governing throw ratios, lens shift, zoom characteristics, and image quality remain constant—understanding these foundations enables confidently adapting to whatever new lens technologies emerge while avoiding the mistakes that trap less knowledgeable competitors in persistent performance and compatibility problems.
The investment in deep lens selection competency through professional education, hands-on experience across diverse projects and lens types, and adoption of sophisticated design tools like XTEN-AV delivers long-term returns across every auditorium installation. This expertise transforms challenging lens specifications into confident selections that optimize performance within budget constraints, differentiates firms from competitors relying on manufacturer default recommendations without critical evaluation, and builds reputations as true optical specialists rather than equipment vendors. Whether specifying lenses for intimate training rooms or grand performing arts centers, systematic lens selection methodology ensures consistently excellent results that satisfy clients, delight audiences, and showcase your professional commitment to technical excellence in every aspect of auditorium projector setup.
Berita Terkini
Berita Terbaru
Daftar Terbaru
News
Berita Terbaru
Flash News
RuangJP
Pemilu
Berita Terkini
Prediksi Bola
Togel Deposit Pulsa
Technology
Otomotif
Berita Terbaru
Daftar Judi Slot Online Terpercaya
Slot yang lagi gacor
Teknologi
Berita terkini
Berita Pemilu
Berita Teknologi
Hiburan
master Slote
Berita Terkini
Pendidikan
Resep
Jasa Backlink
One Piece Terbaru